The Buyer’s Push Lines can be created manually or calculated using the function Add Item Lines on the Home action menu.
There are several methods available to adjust the distributed quantity in the Buyer's Push Lines:
- Changing quantities top-down using the Distribution % and Quantity to Distribute fields.
- Changing quantities bottom-up using the Location Lines page.
- Changing quantities bottom-up using the Group Quantity fields.
- Changing quantities by recalculating lines using an alternative Allocation Rule Calc. Method in the Destination Lines.
To change quantities top-down using the Distribution % and Quantity to Distribute fields
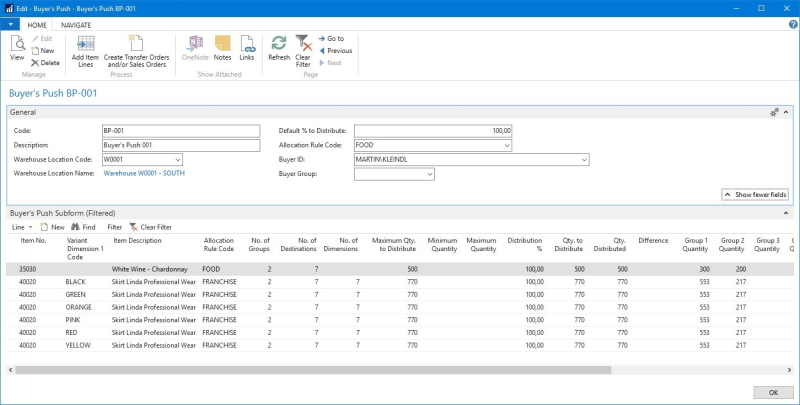
- Navigate to the Buyer's Push page in Departments - LS Retail - Replenishment - Manual.
- Open an existing Buyer's Push, or create a new one.
- Create Buyer's Push Lines manually, or click Add Item Lines on the Home action menu.
- You can use the following fields in the Buyer's Push Lines FastTab to adjust the total distributed quantity in the Buyer's Push Lines:
| Field | Description |
|---|---|
| Distribution % | This field is filled with the value in the Default % to Distribute field on the General FastTab. The value of this field can be changed in the lines and it affects the Quantity to Distribute field. The value is calculated with the following formula: Distribution % = Quantity to Distribute / Maximum Qty. to Distribute (Inventory) * 100 |
| Quantity to Distribute | This field shows the quantity of items that is assigned to be distributed to the stores or customers. The value of this field can be changed in the lines and it affects the Distribution % field. The value is calculated with the following formula: Quantity to Distribute = Maximum Qty. to Distribute (Inventory) * Distribution % |
In the field Quantity to Distribute you can fill in the total quantity you want to distribute from the warehouse to the destination location(s). This field can be changed manually and it will update the field Distribution %.
Alternatively, you can change the field Distribution %. The system will immediately recalculate the Quantity to Distribute field since the fields are linked.
The system will break down the total quantity between the destinations and dimensions (if used). The assigned Allocation Rule is used to calculate the shares between the Store Groups and Locations.
Note:The fields Minimum Quantity and Maximum Quantity can set upper and lower quantity limits for the destination locations. When the system recalculates the distribution top-down, it will consider those fields. Setting those fields could result in differences between the fields Qty. to Distribute and Qty. Distributed, because a value in the field Maximum Quantity could cap the distributed quantity.
To change quantities bottom-up using the Location Lines page
- Navigate to the Buyer's Push page in Departments - LS Retail - Replenishment - Manual.
- Open an existing Buyer's Push, or create a new one.
- Create Buyer's Push Lines manually, or click Add Item Lines on the Home action menu.
-
On the Buyer's Push Lines FastTab, click the Line menu and select Location Lines.

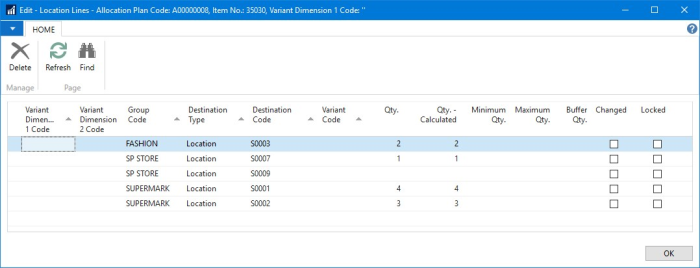
The Location Lines page shows the locations (or customers) which are applied to the Buyer's Push Line according to the selected Allocation Rule. The Location Lines represent the most detailed level in the distribution calculation, and can be seen as the result on lowest level. By default, the Variant Dimension Codes 1 and 2 are shown, but all six Dimension Codes are stored in the Location Lines.
- Change the Qty. field to the new desired quantity.
The check box in the Changed column is automatically selected when you change a quantity. This should help you locate changed lines later. - Select the Locked check box, if you want to preserve the change.
Note: When you change the fields Distribution % or Quantity to Distribute in the Buyer's Push Line, the system will recalculate the distribution between the variants and the locations (or customers) top-down. Only Location Lines with a selected Locked check box will be excluded from this full recalculation.
The system assigns the quantities to the selected Location Lines first and then, in a second step, distributes the remaining quantity to be distributed among the other Location Lines.
Note: It is a common mistake to change the quantity in the Location Line and then forget to select Locked check box.
To change quantities bottom-up using the Group Quantity fields
- Navigate to the Buyer's Push page in Departments - LS Retail - Replenishment - Manual.
- Open an existing Buyer's Push, or create a new one.
- Create Buyer's Push Lines manually, or click Add Item Lines on the Home action menu.
-
Use the following fields on the Buyer's Push Lines FastTab to adjust the total distributed quantity in the Buyer's Push Lines:
Field Description Group 1 Quantity This field shows the quantity distributed to the first Group. Group 2 Quantity This field shows the quantity distributed to the second Group. Group <n> Quantity This field shows the quantity distributed to the <n>-th Group.
-
Click the Group Quantity field, and drill down to the Location Lines.
The Location Lines page shows the locations (or customers) which are applied to the Buyer's Push Line according to the selected Allocation Rule. The Location Lines represent the most detailed level in the distribution calculation and can be seen as the result on lowest level. By default, the Variant Dimension Codes 1 and 2 are shown, but all six Dimension Codes are stored in the Location Lines.
- Change the Qty. field to the new desired quantity.
The check box in the Changed column is automatically selected when you change a quantity. This should help you locate changed lines later. - Select the Locked check box, if you want to preserve the change.
Note: On the Buyer's Push Lines FastTab only six Group Quantity fields are displayed. If the Allocation Rule consists of more groups, you can drill down in the No. of Groups field to access all used groups.
Alternatively, you can click the Line menu, and select Group Lines on the Buyer's Push Lines FastTab. This has the same effect.
To change quantities using an alternative Allocation Rule Calc. Method in the Destination Lines
- Navigate to the Buyer's Push page in Departments - LS Retail - Replenishment - Manual.
- Open an existing Buyer's Push, or create a new one.
- Create Buyer's Push Lines manually, or click Add Item Lines on the Home action menu.
-
On the Buyer's Push Lines FastTab click the Line menu, and select Destination Lines.
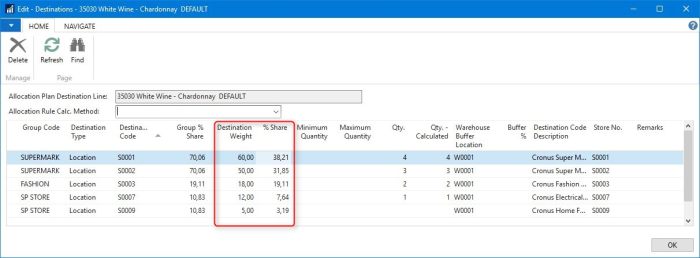
The Destination Lines page shows the locations which are applied to the Buyer's Push Line according to the selected Allocation Rule.
-
Change the Destination Weight field to use a different distribution share.
The field % Share is calculated and represents the share of the individual destination line of the total; the sum of all Store Groups lines should be 100%. - If you want to recalculate all destination weights by applying a different Allocation Rule Calc. Method, select a different calculation method in the header area of the page.
The calculation method change will trigger a recalculation of the Destination Weight fields and update the % Share field.
See Also